-
Echo Knowledge Base
-
-
- Article Page Width
- Article Layout
- Article Sidebars
- Article Page FAQs
- Embedding Google Documents in Articles
-
Add-ons
-
Access Manager
How to Install a KB Add-on
5 out Of 5 Stars
2 ratings
| 5 Stars | 100% | |
| 4 Stars | 0% | |
| 3 Stars | 0% | |
| 2 Stars | 0% | |
| 1 Stars | 0% |
Step 1. Install the Echo Knowledge Base Plugin (if needed)
If you haven’t installed the Echo Knowledge Base plugin, download it. Click here.
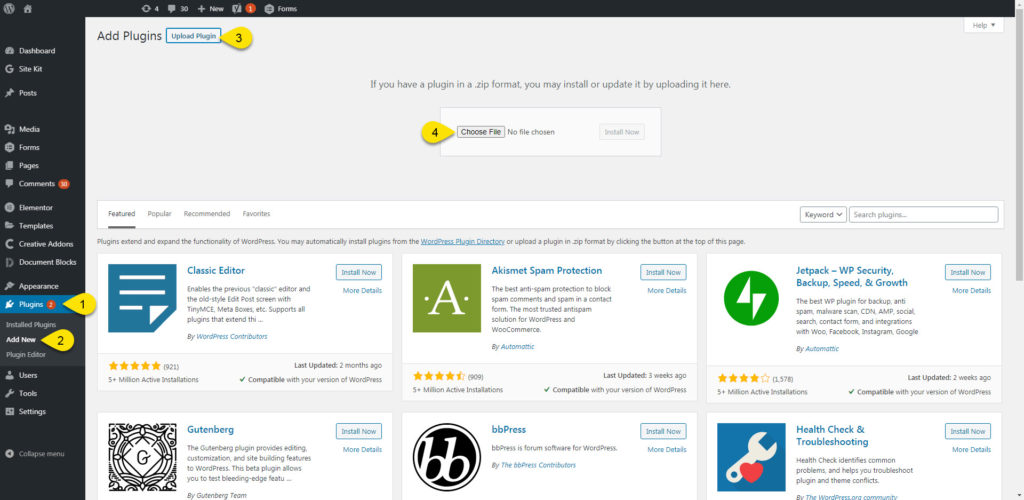
Follow the image instructions to upload the zip file to your website.
Step 2. Download Echo Add-ons
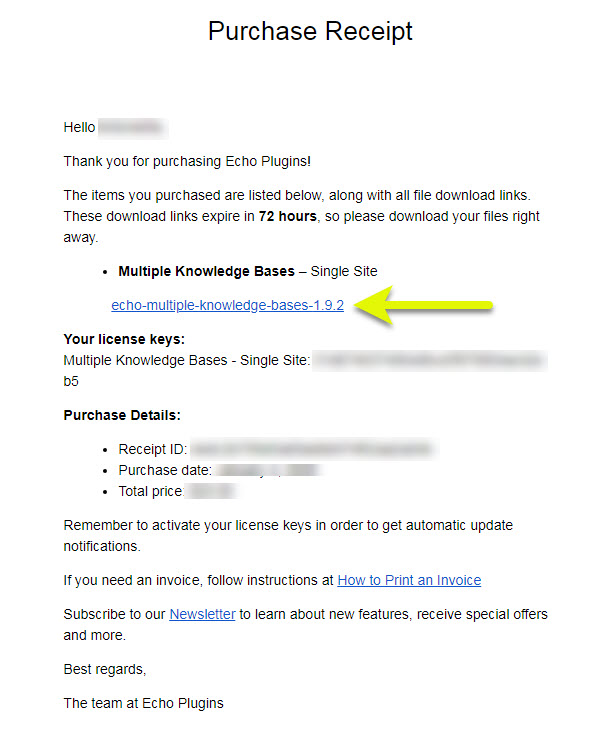
After purchasing your add-ons, you’ll receive a confirmation email. The email will contain a blue download link for each add-on zip file. Click the links to download them.
Step 3. Install Each Add-on
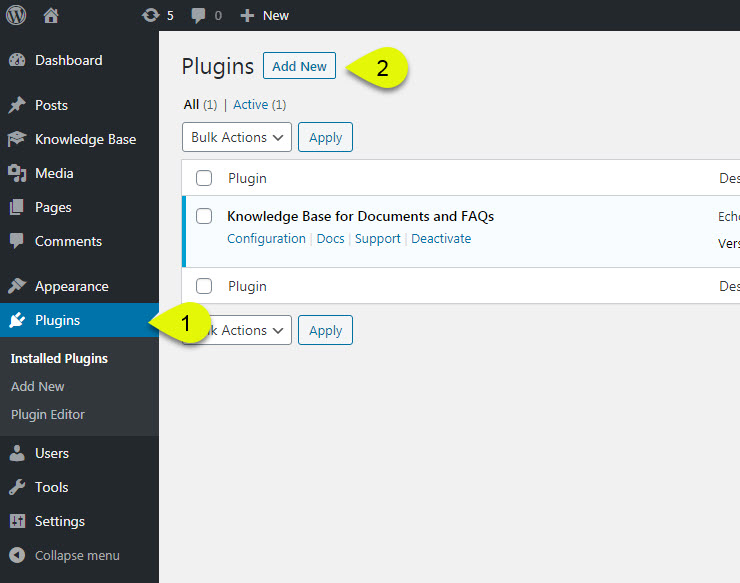
1. Go to the Plugins menu in your WordPress dashboard.
2. Click on the “Add New” button.
Step 4. Upload the Add-on
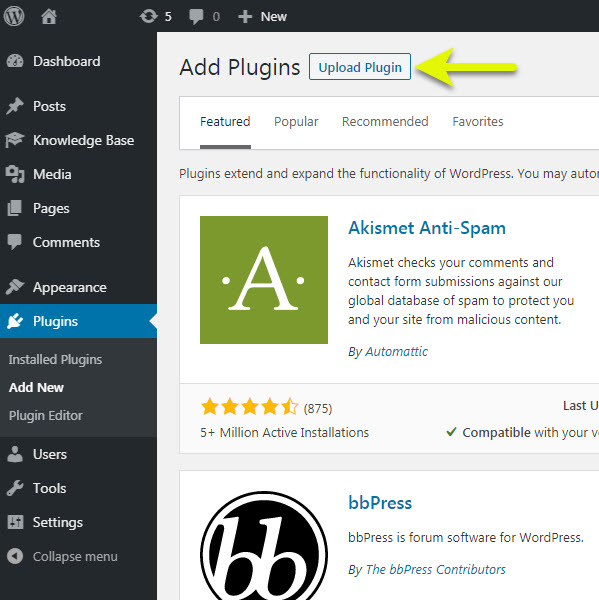
Click the “Upload Plugin” button.
Step 5. Install the Add-on Plugin
1. Choose File – Click on the choose file button, then navigate to the location where you saved the zip file you downloaded in Step 2.
2. Install Now – Click on the install now button to initiate the installation.

Step 6. Activate the Plugin
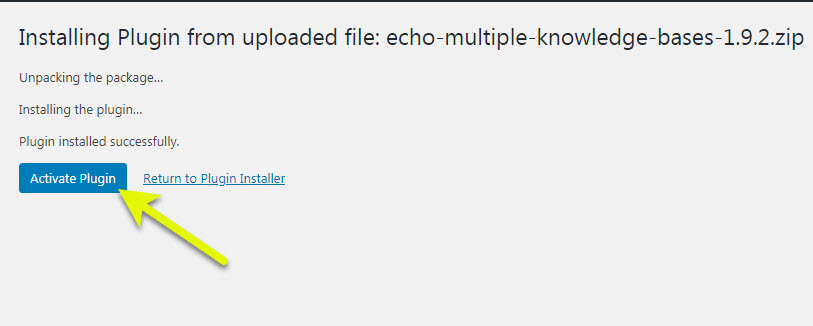
Once you see the message Plugin installed successfully, click on the Activate Plugin button.
In a WordPress multi-site installation, the plugin must be activated on each individual site where it's needed, rather than network-wide, to ensure it maintains separate data for each site.
Step 7. Plugin List
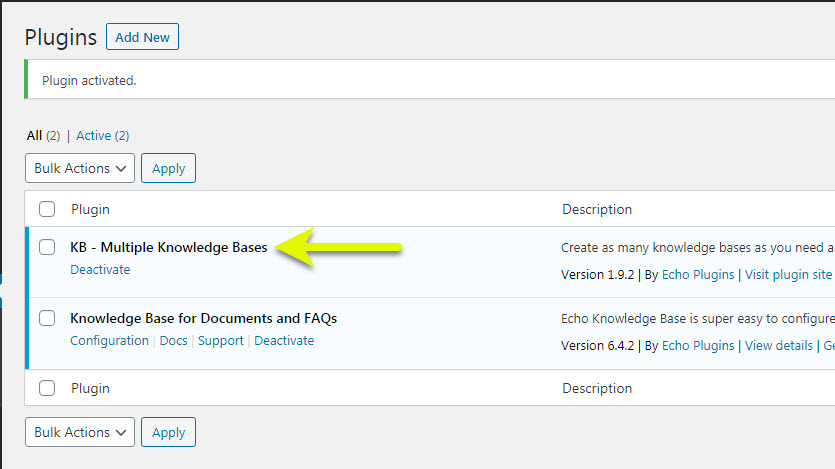
Once installed you can confirm it is active in the plugin list.
Step 8. Activate License Key
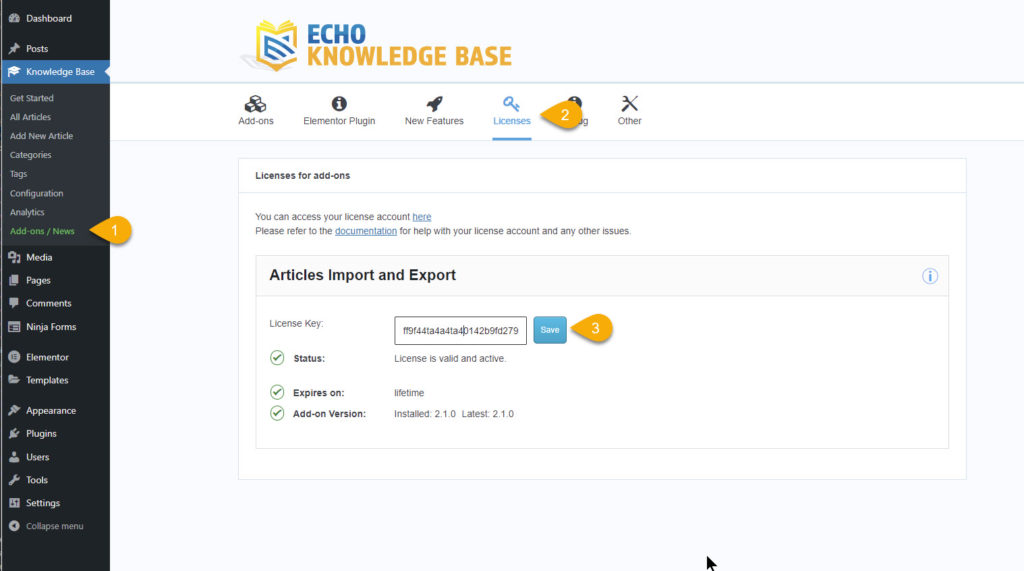
Enter in your license key.
- Navigate to admin > knowledge base > add-ons/news page
- Click on the Licenses Tab
- Enter your license Key that you received from the email from step 2 and click Save.
Repeat Steps 2 – 8 for each add-on you purchased.
To manage your licensing account, please refer to License Account FAQs
5 out Of 5 Stars
2 ratings
| 5 Stars | 100% | |
| 4 Stars | 0% | |
| 3 Stars | 0% | |
| 2 Stars | 0% | |
| 1 Stars | 0% |

